
Getting started
Installation
Upload the theme and EstatePoint Core, install required plugins, and flush permalinks.
Order matters
Install the plugin before the theme where you can. EstatePoint Core registers the property post type and taxonomies; the theme’s admin screens read them. Installing in the other order still works — you may just see empty lists until Core is active.
1. Install EstatePoint Core
- In WordPress, go to Plugins → Add New → Upload Plugin.
- Choose
estatepoint-core.zipfrom your package. - Install Now, then Activate.
You should now see Properties, Consultants, Inquiries, and Testimonials in the admin sidebar.
2. Install the theme
- Go to Appearance → Themes → Add New → Upload Theme.
- Choose
estatepoint.zip. - Install Now, then Activate.
If your host rejects the upload with “The link you followed has expired”, the ZIP is larger than the PHP upload limit. Either raise upload_max_filesize / post_max_size, or unzip the theme locally and upload the estatepoint folder to wp-content/themes/ over FTP or your host’s file manager.
3. Install required plugins
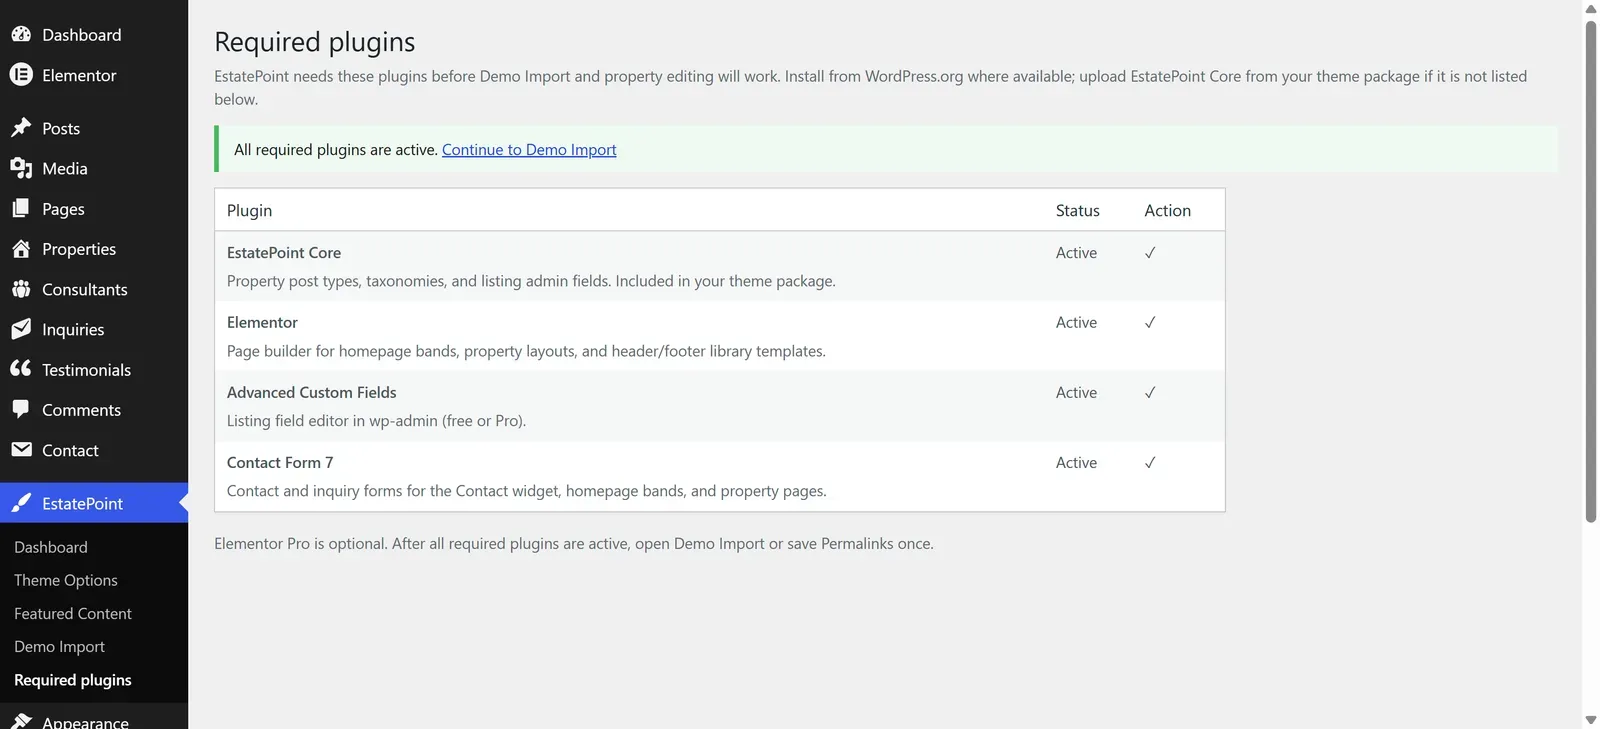
After activation you are redirected to EstatePoint → Required plugins (also reachable from the admin menu at any time).
- Install and activate Elementor, Advanced Custom Fields, and Contact Form 7 from that screen.
- Confirm all four rows show Active.
4. Flush permalinks
Go to Settings → Permalinks and click Save Changes once — without touching any option.
This registers the property browse routes. Skip it and /properties/map/ or /properties/rows/ will 404.
5. Child theme (optional)
Use a child theme only if you plan to edit PHP, CSS, or JS. You do not need one for Elementor edits or Theme Options.
- Upload the parent theme first (step 2 above).
- Appearance → Themes → Add New → Upload Theme →
estatepoint-child.zip→ Activate.
Activate the child theme before running demo import. WordPress stores menu locations per theme, so switching afterwards leaves your menus unassigned.
See Child theme & updates for what belongs in it.
6. Where everything lives
A top-level EstatePoint menu appears in the admin sidebar:
| Menu item | What it does |
|---|---|
| Dashboard | Setup status and shortcuts |
| Theme Options | Brand colors, typography, listing display, layout bindings, currency, license |
| Featured Content | Pin which listings, posts, consultants, and testimonials appear in homepage grids |
| Demo Import | First-time setup checklist and installers |
| Required plugins | Plugin status and one-click install |
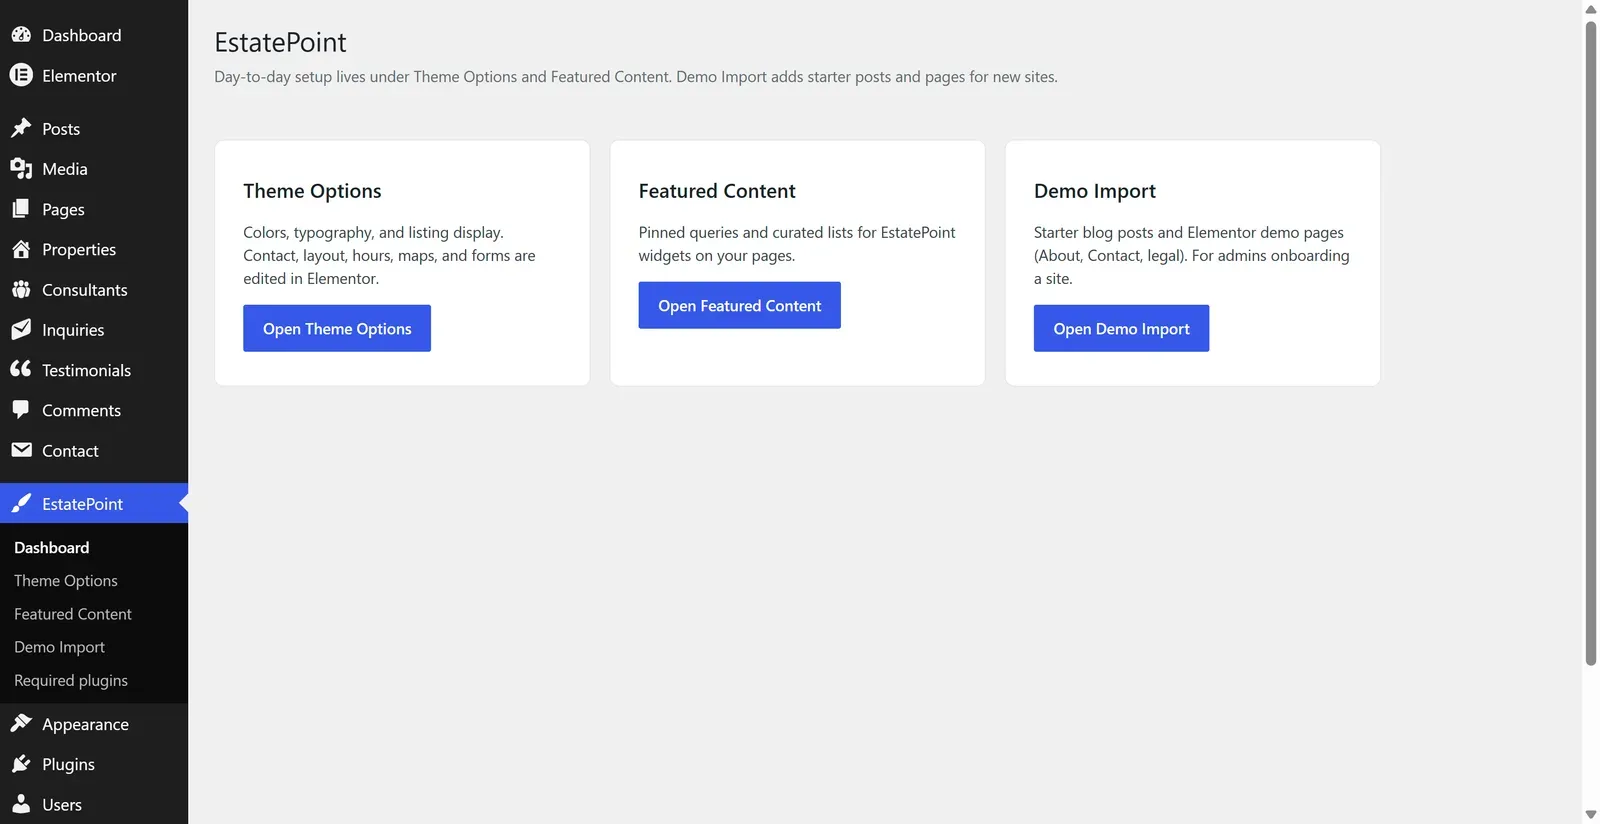
Content lives in its own top-level menus: Properties, Consultants, Inquiries, Testimonials.
Next
Continue with License activation, then Demo import.