
Getting started
Demo import
Install the starter templates, sample listings, pages, and menus from the bundled demo kit.
Before you start
- Finish Installation — EstatePoint Core, Elementor, Advanced Custom Fields, and Contact Form 7 must be Active.
- If licensing is enabled on your build, complete License activation.
- Use a fresh WordPress site for the closest match to the live demo.
- Take a database backup if the site already has content.
Open EstatePoint → Demo Import. The First-time setup checklist at the top tracks what is done and what is still missing.
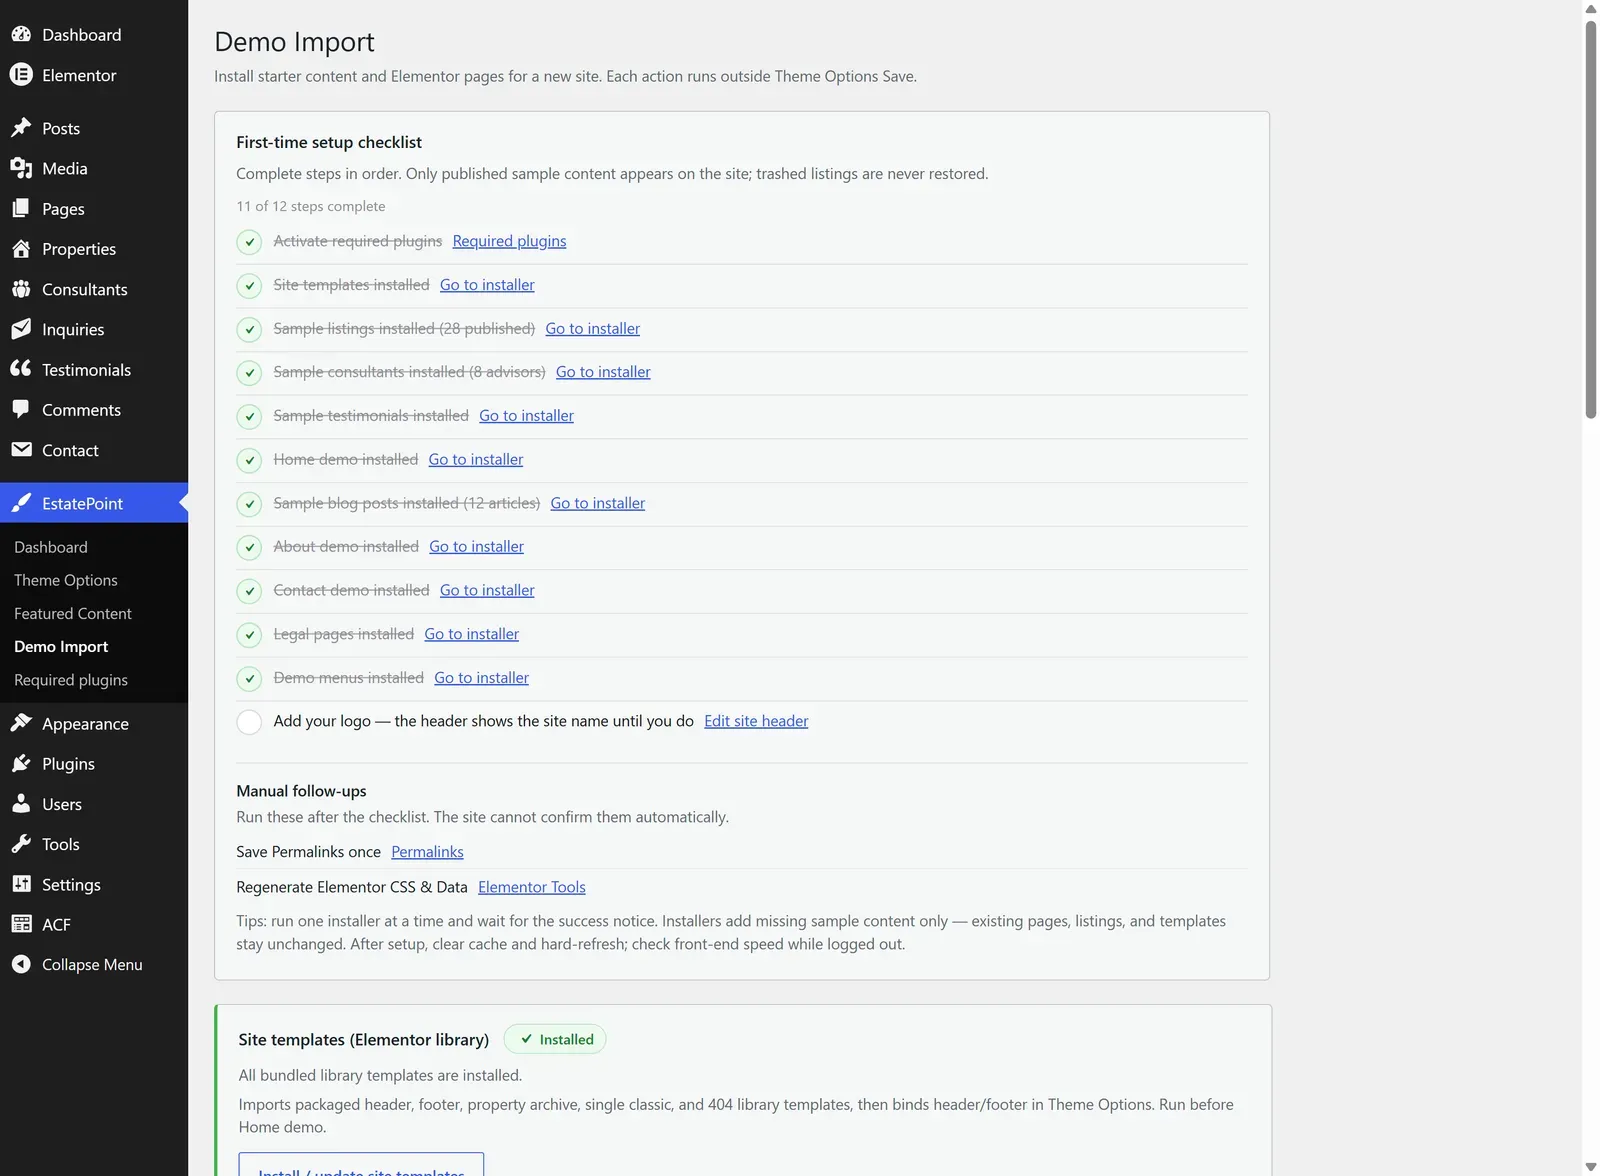
Run the installers in order
Each row has an Install / update button. Later steps assume earlier ones ran.
| # | Button | Installs |
|---|---|---|
| 1 | Install / update site templates | Elementor library templates: header, footer, property archive, property single layouts, blog archive and single, team archive, consultant single, 404 |
| 2 | Install / update sample listings | Sample properties with photos, prices, locations, and features |
| 3 | Install / update sample consultants | Consultant profiles used by team blocks and listing contact cards |
| 4 | Install / update sample testimonials | Client stories for testimonial carousels |
| 5 | Install / update Home demo | The front page, and the Settings → Reading static front page assignment |
| 6 | Install / update sample posts | Blog articles with categories |
| 7 | Install / update About demo | About page |
| 8 | Install / update Contact demo | Contact page |
| 9 | Install / update legal pages | Privacy, terms, cookie placeholders |
| 10 | Install / update demo menus | Primary navigation and footer link menus, assigned to their locations |
Then finish with Elementor → Tools → Regenerate CSS & Data.
Every installed group also has a Remove link (for example Remove sample listings) so you can clear demo content once your own content is ready.
What the kit contains
The demo kit ships inside the theme — nothing is downloaded from a remote demo server except the sample photography.
| Group | Roughly |
|---|---|
| Elementor library templates | 9 documents (header, footer, archives, singles, 404) |
| Pages | 6 (home, about, contact, legal set) |
| Listings | 28 properties across residential, commercial, and land |
| Consultants | 8 profiles |
| Testimonials | 6 stories |
| Blog posts | 12 articles |
How re-running behaves
- Existing content is not overwritten. Re-running an installer skips rows that already exist, so it is safe to press twice.
- Trashed demo content is never restored automatically. Restore it from the WordPress trash instead.
- Site templates re-import their bundled content, which is how Restore default template works on the layout binding cards in Theme Options.
- Sample listings are not created on plugin activation — nothing appears until you run demo import.
If images do not appear
Sample photography is downloaded during import. Failures almost always mean your host blocks outbound HTTP.
- Ask your host to allow outbound requests, then re-run the listing installer.
- Or replace the media manually — the listings themselves import fine without photos.
Common notices
| Notice | Meaning |
|---|---|
| Elementor is not active… | Install and activate Elementor first |
| EstatePoint Core is not active… | Activate the Core plugin from your package |
| Demo import is locked until the license is activated. | Activate your purchase code first |
| Partial install messages | Some items already existed and were skipped — normal on a re-run |
Next
After import — the cleanup pass before you show the site to anyone.